by Cheri of From Out of the Cracks
“The good old days are good and gone. That’s why they’re good, because they’re gone.” - Loudon Wainwright
Where does that creativity come from? What was the inspiration, the spark? Do you go somewhere to get inspired?
Here is our featured HandmadeMN artist Sara Werzel from Auntie B Online, an online shop providing you with magnets, drink charms, candles, and when the mood strikes, miscellaneous ephemera. You can also check out Sara on her Auntie B’s Wax blog, facebook and twitter.
Sara says, "What inspires me? Nostalgia. I’m old enough now where I remember the good old days, and like most mature people I romanticize them to death. I find comfort in the days of my youth, and the days of generations before me ~ simpler times when people read books with pages made of actual paper and movies stars were glamorous.
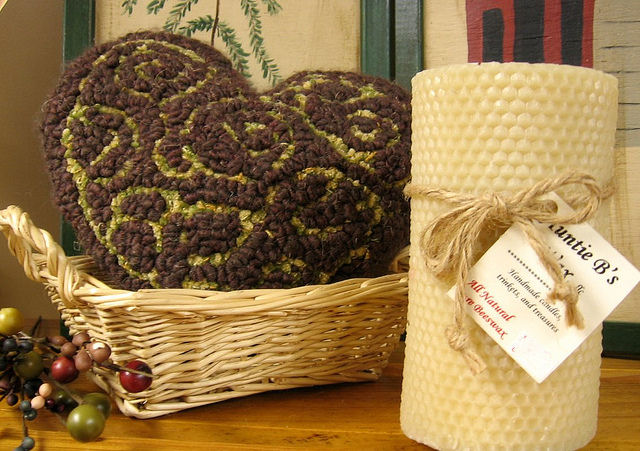
My beeswax candles hearken back to the days before electricity. My scented candles remind me of carnivals, flower gardens, grandma’s kitchen, and Christmases filled with goodies and the belief in Santa.
My pulp fiction magnets take me back to the pile of smutty books my grandma kept beside her reading chair.
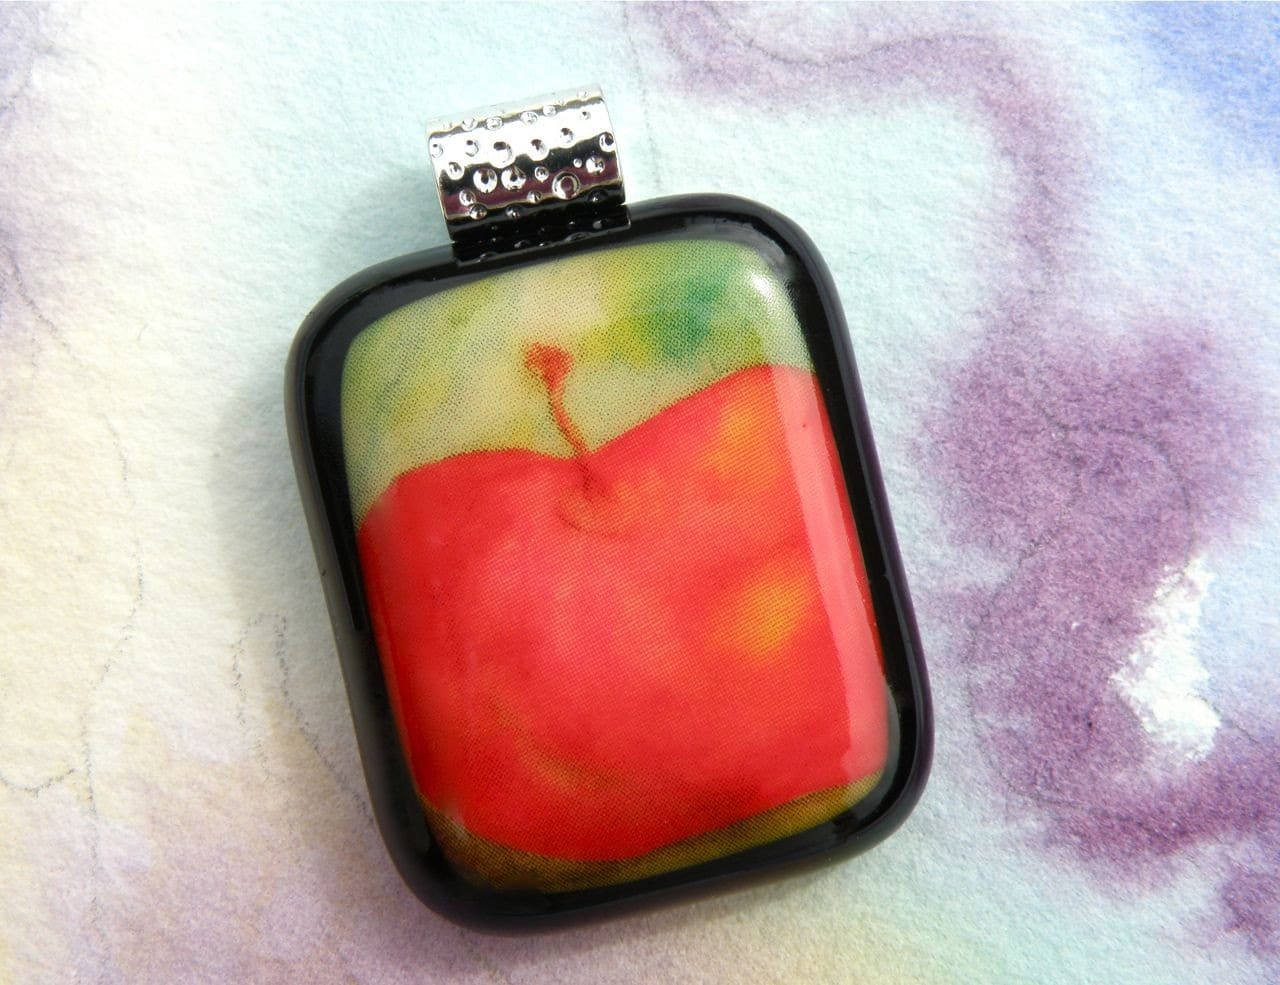
My bottle cap magnets have images of days gone by, children's book illustrations, and purity represented by something as simple as a red apple. My drink charms take me back to the golden age of Hollywood and vintage TV. That others smile and laugh at the memories I provide also inspires me ~ I like knowing they love the good old days too."
Gratitude
For the beauty of the Earth,
For the splendor of the Skies,
For the Love which from our birth,
Over and around us lies.
Lord of All, to thee we raise
This our hymn of grateful praise.
Yesterday as I left the house for my morning walk, the temperature was 49F and the sky was blue and brilliantly clear. I could see the setting moon and it took my breath away. The words to this old hymn popped into my mind, and stayed with me through the entire walk.
I hope you all enjoy the day!
The Farmer's Daughter
By Sara of Auntie B Online
White Bear Lake, Minnesota is a lovely suburb of St. Paul and is known for it's quaint shops and small-town feel. Unlike lots of other suburbs with their strip malls and freeway access, White Bear Lake is like a little town unto itself. I love White Bear Lake.
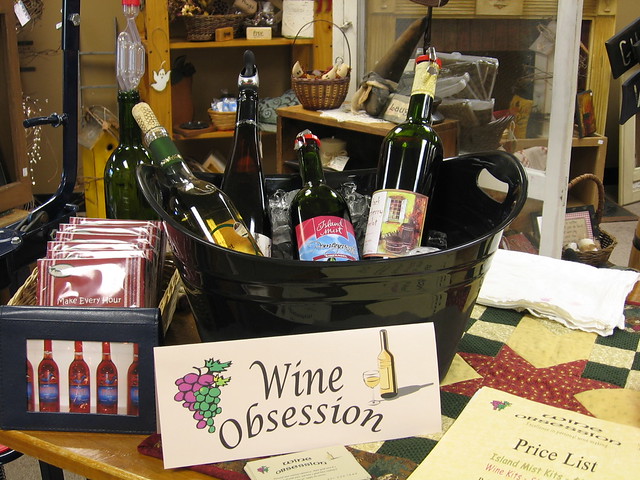
One of the shining stars of White Bear Lake is a shop known as The Farmer's Daughter. It's full of handmade goodness from local crafters and artisans. Last Friday The Farmer's Daughter hosted a Wine Showcase, featuring wine-related items in the shop. There were also special guests in attendance.
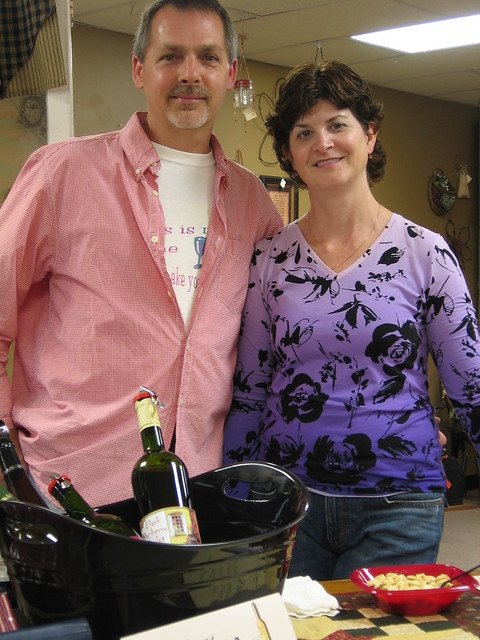
Meet John and Connie. They own Wine Obsession, a service that will help you make your own wine, right in White Bear Lake. You don't even have to grow your own grapes! They served samples of wines made with the wine-making kits they offer. Delicious! I really loved the chocolate raspberry port.
If you'd like more information on Wine Obsession and how to join the fun of making your own wine, contact The Farmer's Daughter.
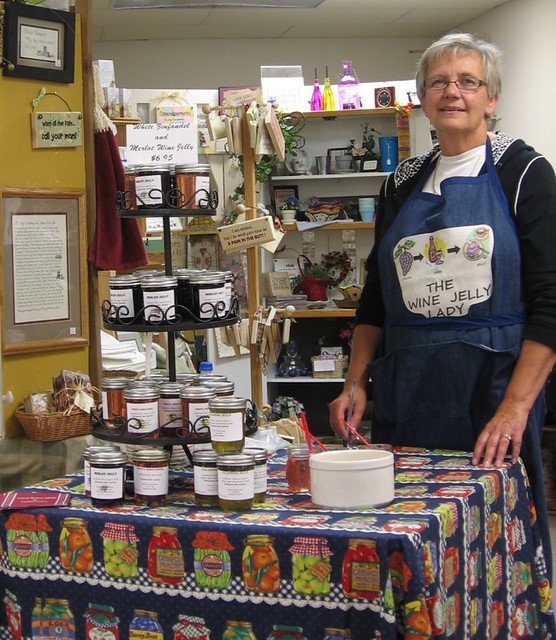
Sandi was also in attendance. She makes the most delicious wine jellies.
I bought two jars myself. As you may know, jellies are not just for toast anymore. Sandi told me all about the different things you can do with her jellies, including using them for pancake syrup and mixing them into meatloaf. Who knew? You can find out more about these winey jellies here. You'll love them.
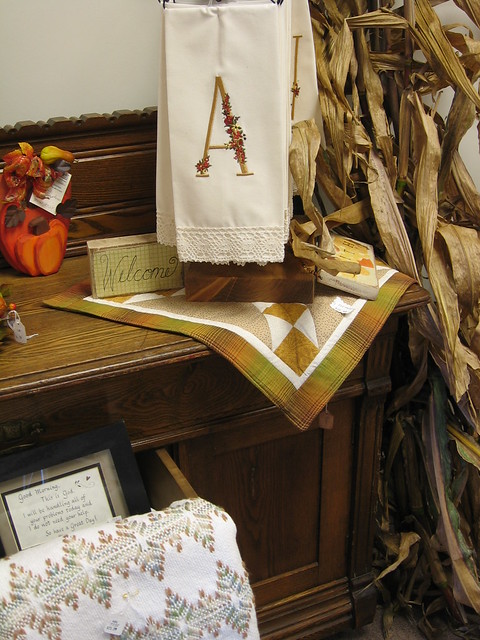
The Farmer's Daughter isn't just about wine, however. It's a shop full of rustic treasures, kitchy magnets, beautiful stitchery, and every other kind of artsy, crafty thing you can think of. Take a look...
What did I tell you? There's a little bit of everything. Wait, there's more!
Right now The Farmer's Daughter has the autumn theme in full swing.
The Farmer's Daughter is the perfect place to shop ~ you can get gifts for your girlies and goodies for your gala.
Yes, I know a farmer's daughter, and she's one of my favorite people. If you haven't visited this shop, it's about time you did. If you're a visitor in the Twin Cities area, come on up to White Bear Lake and make The Farmer's Daughter one of your stops. The farmer's daughter is a charm, and so is her store!
Finished Granny Square Sweater :-)
All the blocks are sewn together, and the sweater is done! Actually it is more like a jacket. A bit on the heavy side, but this morning at 54F it was the perfect outer layer.
After stitching up the first sleeve it was apparent that the sleeves would be too long, so I removed the last row of squares from the bottom of the sleeves. Much better :-)
The pattern came from the Jan/Feb '08 issue of Crochet Today. Now, to get back to dollmaking :-)
After stitching up the first sleeve it was apparent that the sleeves would be too long, so I removed the last row of squares from the bottom of the sleeves. Much better :-)
And don't forget to block!
The pattern came from the Jan/Feb '08 issue of Crochet Today. Now, to get back to dollmaking :-)
HandmadeMN Giveaway - Connected Elements Designs
By Michelle of Evie's Tool Emporium
Congratulations to our latest giveaway winner! Thanks to all who entered and we wish you good luck with this week's giveaway!
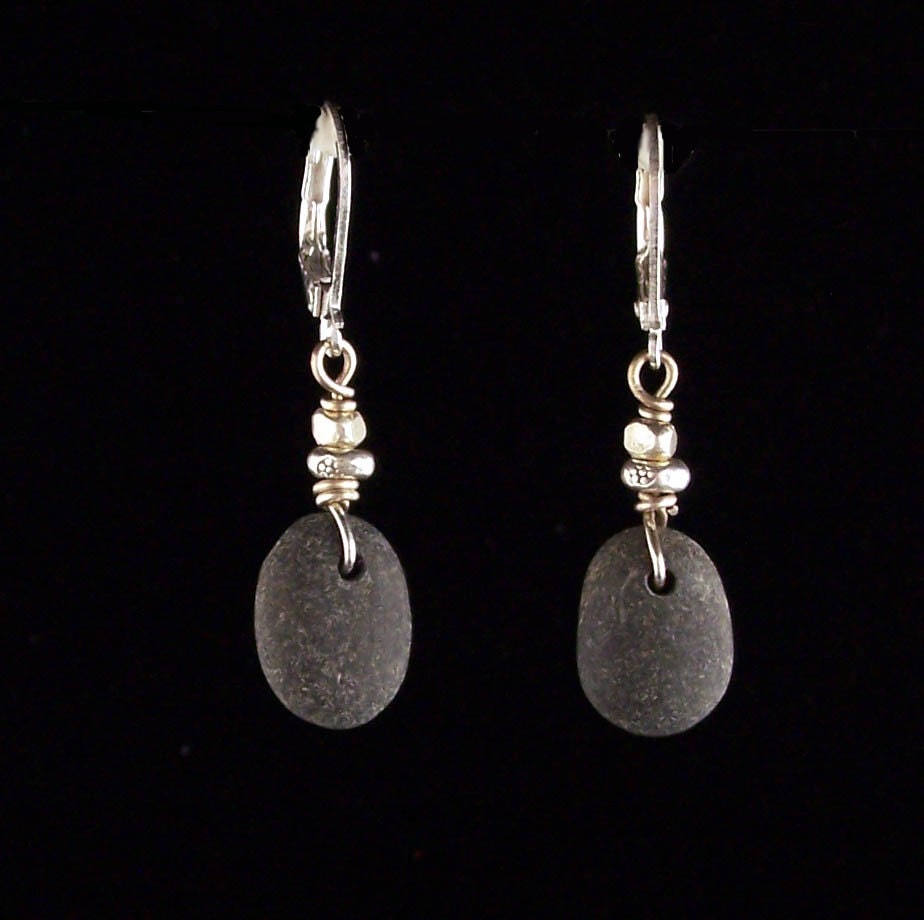
Today we bring you these wonderful Lake Superior beach stone earrings from Candy of Connected Elements Designs!
Lake Superior Beach Stone Earrings
Sweet pebble earrings from the shores of Lake Superior! Rock collecting was an obsession long before they became jewelry in Candy's life. She loves being able to have a touch of nature with her always! For these earrings the stone choice is hers and varies from black to grey to red...let her know if you have a preference. The earrings are wrapped with sterling wire and hang from secure lever back ear wires.
How to Enter:
Visit Candy's shop, pick your favorite item and leave a comment on this post about it.
Open to US and international residents.
Please make sure we have a way to contact you!
For Bonus Entries:
Please leave each in a separate comment, as each comment is an entry (To qualify for extra entries you must do step one above).
1. Visit other HandmadeMN team members shops (listed in the sidebar here) and leave a comment(s) here with your favorite pieces.
2. Blog about this giveaway with a visible link back to this posting and comment here with a link to your post.
3. Tweet about this giveaway and leave a comment(s) with a link to your tweet(s).
4. Follow our blog (you want to do this anyway to learn about upcoming giveaways!). Leave a comment here letting us know you are a follower. If you are already a follower, leave a comment anyway, as each comment is an entry.
5. Follow HandmadeMN on Twitter. Comment back here with your Twitter link. Existing followers just leave your Twitter link here.
6. Become a HandmadeMN Facebook Fan. Comment back here with your Facebook name. Existing fans just leave your Facebook name here.
7. Become Candy's Facebook Fan. Comment back here with your Facebook name. Existing fans just leave your Facebook name here.
Contest ends Saturday, October 9, at 12:00 noon Central. One winner will be chosen by Random.org.
Good luck!
HandmadeMN members are not eligible to win.
Fun Friday Finds ~ Handmade Sunshine
By Jenna Halek ~ Artistic Edition
Handmade Sunshine
(Click on the image to enlarge)
Visit these HandmadeMN shops to see more:
Click on any of the names below
Minnesota Hot Dish
by Cheri of From Out of the Cracks
Today's tasty summer recipe is from the inventive Christine Stanton of Prayer Bedes. Christine says, "here is a recipe I just made tonight, and it turned out quite good. The idea for the cucumber cups was found in a few places online. The filling I made up myself, with modifications from a few recipes. My mom has a curry sauce that she serves with grilled salmon, which led to the curried salmon salad idea."
Christine also has recommedations for "changing up" this recipe, "a filling with dill would also work nice. You could just leave out the curry powder, nuts, and raisins. Substituting Greek yogurt for the mayonnaise might also be a possibility. I am also thinking of trying something with Greek tzatsiki sauce and and grilled chicken next."
Curried Salmon Salad Cucumber Cups
Ingredients:
5 medium cucumbers
1 can salmon
juice of 1 lemon
1/4 - 1/2 c. mayonnaise
heaping teaspoon curry powder
pinch sea salt1/4 c. chopped walnuts
1/4 c. raisins
1/2 red pepper chopped (I added this for color)
Directions:
- Peel cucumbers then score with a fork.
- Cut into about 3/4" slices.
- Scoop out centers with a mellon baller- Mix together remaining ingredients
Fill cups with salmon mixture
Smart Chicks Really Do Kick It
I have been writing. Writing, writing, writing. Book 2, Book 2, Book 2. And sometimes talking about Book 2 to my husband, who patiently listens and even throws in his two cents occasionally as I try to work out my novel's issues out loud with him. And writing some more. And dreaming about Book 2. And listening to music that particularly inspires me for Book 2. And researching stuff I need to know about for Book 2, the rodeo, for instance. And talking into my voice recorder, which mostly happens while I am driving, the recorder swinging from my rearview mirror while I dictate dialogue and plot points and genius ideas, all for Book 2.
In other words, I haven't been doing much but writing these days.
But yesterday I made an exception, because the Smart Chicks were here. This is a group of YA authors who are touring all over the country this month, a fun and rowdy and talented group of women who all have amazing books. Last year, when I was writing Unearthly, I read all the YA books I could get my hands on, for research, I told everybody. But really it was because I loved reading them! And so many of those books were written by these women.
I am a total fangrrl, is what I'm saying. So I packed myself up and made the one-hour trek in LA rush hour traffic to Pasadena to see them. Geek to the core, I arrived an hour early, went straight up to the info desk to grab my signing ticket (at these things, the lines to have the authors sign their books is so long they give you a number, so they can call you inside the bookstore in groups) and spent the next 15 minutes agonizing over which books I wanted to buy to have signed. Up until this moment I had thought the Kindle was the best invention ever. Now, because I read almost everything on Kindle, I had nothing for the authors to sign. There were just so many books, and so little money!
I settled on a few books, then headed outside to this nice little area where the Smart Chicks would be presenting. I found myself a good seat. I met all the women sitting around me. Seriously, one of the girls sitting right next to me brought more than 30 books from home to be signed. 30, people. Seriously. I was worried for her back, lugging that bag around. I was worried for the authors' cramped fingers.
A couple of my Pepperdine students showed up, so we chatted about the difference between literary readings and YA signings. Here's the difference in a nutshell: screaming. Especially when the Smart Chicks started handing out ARCs of their latest books. Screaming, jumping, wild cheering. That and I've never heard fans of Ron Hansen or Annie Proulx play MarryShagCliff, where the fans name the character from the author's book whom they would like to marry, the one they'd like to um, kiss, and the one they would throw off a cliff.
In other words, I haven't been doing much but writing these days.
But yesterday I made an exception, because the Smart Chicks were here. This is a group of YA authors who are touring all over the country this month, a fun and rowdy and talented group of women who all have amazing books. Last year, when I was writing Unearthly, I read all the YA books I could get my hands on, for research, I told everybody. But really it was because I loved reading them! And so many of those books were written by these women.
(Smart Chicks Pasadena from left to right: Rachel Caine, Alyson Noel (behind), Margaret Stohl, Melissa De La Cruz, Kami Garcia, Melissa Marr, Kelly Armstrong, Rachel Vincent, Mary E. Pearson)
I am a total fangrrl, is what I'm saying. So I packed myself up and made the one-hour trek in LA rush hour traffic to Pasadena to see them. Geek to the core, I arrived an hour early, went straight up to the info desk to grab my signing ticket (at these things, the lines to have the authors sign their books is so long they give you a number, so they can call you inside the bookstore in groups) and spent the next 15 minutes agonizing over which books I wanted to buy to have signed. Up until this moment I had thought the Kindle was the best invention ever. Now, because I read almost everything on Kindle, I had nothing for the authors to sign. There were just so many books, and so little money!
I settled on a few books, then headed outside to this nice little area where the Smart Chicks would be presenting. I found myself a good seat. I met all the women sitting around me. Seriously, one of the girls sitting right next to me brought more than 30 books from home to be signed. 30, people. Seriously. I was worried for her back, lugging that bag around. I was worried for the authors' cramped fingers.
A couple of my Pepperdine students showed up, so we chatted about the difference between literary readings and YA signings. Here's the difference in a nutshell: screaming. Especially when the Smart Chicks started handing out ARCs of their latest books. Screaming, jumping, wild cheering. That and I've never heard fans of Ron Hansen or Annie Proulx play MarryShagCliff, where the fans name the character from the author's book whom they would like to marry, the one they'd like to um, kiss, and the one they would throw off a cliff.
(Kami Garcia tries to explain how height was not a factor in who contributed more to the novel Beautiful Creatures, written by Kami Garcia and Margaret Stohl.)
The writers seemed be having loads of fun. I've been to some literary readings where the writers looked like they'd rather be getting their teeth pulled, so I found all the fun and games refreshing. And the fans. . .wow. Did I mention the screaming? My students, of course, were far too cool and sophisticated to get so excited as the wild-eyed, book-laden YA fans, but my student Lauren proved to be pretty adept at snagging stuff out of the air when the authors started throwing book-related knick knacks and gifts out to the crowd. My other student in attendance, Zach, was simply trying to maintain his testosterone level in this large crowd of mostly women. Oh, what students will do for extra credit. . .
(Melissa Marr answers questions from the fans)
I, for one, was encouraged by the enthusiasm of the fans. Some of these people could be my fans someday soon. And that was indescribably cool to think about. And humbling, in a way.
After the authors answered questions and played and riled up the fans, they retreated inside to an upstairs section of the bookstore. I was milling around with the other folks, waiting for my number to be called, when I bumped into another fabulous YA author/ fellow fangrrl in the audience: Katie Alender. Katie's book, Bad Girls Don't Die, was the best and only ghost story I read this year--I picked it up off the shelf of a Barnes and Noble because of its perfectly beautiful and creepy cover:
(This book was awesome! See Katie's website here)
I was so excited to meet Katie that I hugged her. She was nice enough to not get too freaked out. We had some time to talk as we waited for our numbers to be called, and it was so great, just shooting the breeze about our current deadlines and our experiences in publishing and our writing lives. I would have driven the hour just to meet her. I'm sure I sounded starved for companionship, but really, that's what I am. I need the companionship of other writers, YA writers especially! That's been largely missing from my life since I moved to California, and it's something I yearn for (here's the part where my husband says, "what I am, chopped liver?" and I say "no, dear, but you're my husband, you don't count" and he looks all offended). I need me some writing peeps!
Finally my number was called and I got to go inside and up the stairs, where the Smart Chicks were sitting at long tables signing copies of their books. First I got to meet Mary Pearson, who wrote one of my favorite books this year, The Adoration of Jenna Fox. I own this book on Kindle but bought a hard copy, I liked it that much. In fact, I remember turning to my husband after I finished reading it and saying, "Well, I wish I had written that." Very cool book.
I was completely tongue-tied when I got to Melissa Marr. I managed to get out that I had bought a book for her to sign for my old friend and college roommate, Amy, who adores Melissa Marr. A-dores. And she said thank you and then said something nice that I didn't catch because I was so star struck, and I totally forgot that I had my camera. Now kicking myself that I didn't get a picture with Melissa Marr. I did get pictures with some of the other authors, but most of them didn't really turn out because, in order to get a picture, the author had to lean forward and I had to lean way back over the table, which is not the best angle for me.
Everyone was sooooo nice. Margaret Stohl even pulled off her own name card and signed it for me when I told her how much I loved Beautiful Creatures, but alas, it was on my Kindle!
(Margaret Stohl's name card, which reads "Cynthia is a beautiful creature." Aw.)
After the signings I went back downstairs and found Katie again, who was still outside waiting. It was a long line, did I mention? She mentioned a group of YA writers in the LA area called the LA YAs. Woohoo, writing peeps! Then, after a little more talk with her, I went home. Through traffic (although not so bad now, as it was close to 8pm), in the dark.
(the drive home--don't worry, traffic was fully stopped on the freeway when I took this pic; I don't click and drive)
I didn't mind at all.
A Drink from the Well: Crash course in DIY framing
This tutorial brought to you by Theresa B of Egret Effects.
Nothing makes your house feel more like a home than seeing your favorite photos and artwork on your walls. I'll admit there was a time I used that sticky blue gum to hang things (namely, magazine cutouts circa my high school days), but a couple years as a custom framer has taught me that preserving and displaying your art can be, well, an art.
The thought of custom framing summons visions of dollar signs for many of us, and there's a good reason for that. Anything custom-made has a price tag that reflects the fact that it can't be used for anything but the one special thing for which it was made. A custom frame is well-built, the materials are suited for preserving whatever's going in it, and there's a surprising amount of ingenuity a framer must possess to design and fit together a finished piece.
That said, you're not going to have everything in your home custom framed unless you are, perhaps, Oprah Winfrey. Using my prized inaugural season home-opener Twins ticket, here are some pointers for framing at home.
The Frame
Buy a frame that's roughly proportional to your art. My ticket is about the size of a dollar bill. This frame is nicely wrapped so I'm pretty sure it's in good shape, and I can tell that the "writing" on the glass is just a decal.
When I get home, I open the frame and inspect it. Any work on the frame should be done while it's totally disassembled to prevent potential damage to the artwork. Attach the hanging hardware if necessary. Nicks in the frame can often be touched up with a marker - but test the color on the back of the frame first! Marks on the mat can often just be erased.
The Mounting
This is usually where some finagling has to take place. My *simple* project has three little problems: the backing is destroyed from pulling the mat off of it, the mat opening is not the right size, and the ticket is not flat.
Problem one is an easy fix. I cut a piece of black scrapbooking paper to the size of the frame for a new, preservation-friendly backing.
Problem two is more complicated. Skipping the mat altogether would be simple, but then a new problem would arise - the ticket would press against the glass. Any amount of moisture in there will wick right to the ticket and ruin it. So I can either have a mat custom cut (which might be $10-$20 for something small like this), or I can cut it myself.
Never try to cut a mat unless you have a mat cutter. Using a utility knife or an Exacto will not be pretty. Mat cutters are at least $50, but if you plan on doing this more than two or three times it's a good investment. They all work a little differently, so follow the directions closely and do some practice mats. Mat blanks (pieces that have no opening) can be purchased at most craft stores for a few dollars. In this case, I'm just going to cut the existing mat. And here is the most important fact about framing: You know how they say to measure twice and cut once? Well, they do. And they mean it.
I want 3/8 of an inch of the black backing to show on each side of the ticket, so I add that to the ticket length and width to figure the mat opening. If I didn't want any of the backing to show, I would have to get a new mat blank and make the opening small enough to cover 1/8 inch of the art on each side to account for uneven edges or unsquare mat cuts.
Problem three can be solved simply by cutting strips of scrap matting 1/4 inch narrower than the mat and sticking them to the underside, lined up with the outside edge. This is called a raised mat, and it will prevent wavy or otherwise irregular artwork from touching the glass.
Now I can stick the raised mat to the backing, hold the ticket in position, and mount it to the backing with photo corners. Photo corners are essentially little pockets with sticky undersides. The ticket's four corners fit into the pockets, and the adhesive needs only to stick to the backing. The less adhesive on your artwork, the better the preservation. If the mat were overlapping the ticket, I would "hang" the ticket on two pieces of acid-free tape - one at each of the top corners.
Preservation-wise, the only thing missing from my project is UV-protective glass. You can have glass cut to the appropriate size with the cost depending on the grade of protection.
The Specs
As a framer, I've seen designs like this sell for anywhere between $50 and $300. That is money well-spent for a piece of art you want to take care of in the best possible ways. I sacrificed the wide selection of frame styles and mat colors, a few preservation techniques, and a little of my time - but I dropped less than $5 on this project. Of course, that doesn't account for the price of the ticket.
HandmadeMN Giveaway - Hungry Dog Designs
By Jessica of Clay By Clay
Congratulations to our latest giveaway winner! Thanks to all who entered and we wish you good luck with this week's giveaway!
This week Paula of Hunry Dog Designs is giving away this adorable walrus paperdoll/greeting card.
This playful Walrus paper doll doubles as a greeting card and magnet. Made with decorative paper, the Walrus paper doll includes magnet and small black note card on the back of him. He also has moveable arms and legs and comes in his very own #10 envelope. Hungry Dog Designs' paper dolls are both the card and the gift!
Open to US and International residents.
How to Enter:
Visit Paula's shop, pick your favorite item and leave a comment on this post about it. (Scroll to bottom of post and click on Comments)
Please make sure we have a way to contact you!
For Bonus Entries:
Please leave each in a separate comment, as each comment is an entry (To qualify for extra entries you must do step one above).
1. Visit other HandmadeMN team members shops (listed in the sidebar here) and leave a comment(s) here with your favorite pieces.
2. Blog about this giveaway with a visible link back to this posting and comment here with a link to your post.
3. Tweet about this giveaway and leave a comment(s) with a link to your tweet(s).
4. Follow our blog (you want to do this anyway to learn about upcoming giveaways!). Leave a comment here letting us know you are a follower. If you are already a follower, leave a comment anyway, as each comment is an entry.
5. Follow HandmadeMN on Twitter. Comment back here with your Twitter link. Existing followers just leave your Twitter link here.
6. Follow Hungry Dog Designs on Twitter. Comment back here with your Twitter link. Existing followers just leave your Twitter link here.
7. Become a Facebook Fan of HandmadeMN. Comment back here with your Facebook name. Existing fans just leave your Facebook name here.
8. Become a Facebook Fan of Hungry Dog Designs. Comment back here with your Facebook name. Existing fans just leave your Facebook name here.
Contest ends Saturday, October 2, at 12:00 noon Central. One winner will be chosen by Random.org.
Good luck!
HandmadeMN members are not eligible to win.
Fun Friday Finds ~ Falling for HandmadeMN
By Jenna Halek ~ Artistic Edition
Visit these HandmadeMN shops to see more:
Click on any of the names below
Finally!!
It has been a while :-) My latest WIP is this gorgeous granny square sweater from the January/February 2008 issue of Crochet Today. I love the simplicity of this design, and just had to give it a try, but I must admit that 68 squares of the same design did try my patience. But they are now DONE!
Next step, stitch them all together :-)
I had help in the form of another little Pocket Spirit. Here she is overseeing the square production.
When the sweater is done, I'll be back to Christmas crochet for the nieces!
Next step, stitch them all together :-)
I had help in the form of another little Pocket Spirit. Here she is overseeing the square production.
When the sweater is done, I'll be back to Christmas crochet for the nieces!
September Challenge Winner
By Toni of Wild Dog Studio
Congratulations to Monique of Glass Garden Designs for winning September's HandmadeMN monthly challenge!
Thanks to all who participated in this month's challenge, and stay tuned for some great "Farewell to Summer" entries coming soon!
Congratulations to Monique of Glass Garden Designs for winning September's HandmadeMN monthly challenge!
Thanks to all who participated in this month's challenge, and stay tuned for some great "Farewell to Summer" entries coming soon!
HandmadeMN Giveaway - Gotthold Glass Studio
By Michelle of Evie's Tool Emporium
Congratulations to our latest giveaway winner! Thanks to all who entered and we wish you good luck with this week's giveaway!
Today we bring you this gorgeous petite fused glass pendant from Michelle of Gotthold Glass Studio!
Petite Fused Glass Pendant
This petite fused glass pendant reminds me of a sunrise! Wisps of pink with a hint of tangerine swirl on a white background in this vibrant piece. This pendant has a lot of visual depth -- the colors are not just on the surface of the pendant, but mixed throughout.
This piece is truly one of a kind, as it's made from a high firing process known as a potmelt. To do this, Michelle places pieces of glass in a flowerpot which she then heats in her kiln until the glass gets so hot that it flows out the hole in the bottom of the pot. The designs and colors of the resulting glass disk are quite unpredictable! Michelle then carefully chooses the most interesting areas of the melt to turn into pendants.
Measurements:
width: 15 mm
height: 25 mm(with bail)
thickness: 7 mm
How to Enter:
Visit Michelle's shop, pick your favorite item and leave a comment on this post about it.
Open to US residents .
Please make sure we have a way to contact you!
For Bonus Entries:
Please leave each in a separate comment, as each comment is an entry (To qualify for extra entries you must do step one above).
1. Visit other HandmadeMN team members shops (listed in the sidebar here) and leave a comment(s) here with your favorite pieces.
2. Blog about this giveaway with a visible link back to this posting and comment here with a link to your post.
3. Tweet about this giveaway and leave a comment(s) with a link to your tweet(s).
4. Follow our blog (you want to do this anyway to learn about upcoming giveaways!). Leave a comment here letting us know you are a follower. If you are already a follower, leave a comment anyway, as each comment is an entry.
5. Follow HandmadeMN on Twitter. Comment back here with your Twitter link. Existing followers just leave your Twitter link here.
6. Become a HandmadeMN Facebook Fan. Comment back here with your Facebook name. Existing fans just leave your Facebook name here.
7. Become Michelle's Facebook Fan. Comment back here with your Facebook name. Existing fans just leave your Facebook name here.
8. Follow Michelles's blog Gotthold Glass. Leave a comment here letting us know you are a follower.
Contest ends Saturday, September 25, at 12:00 noon Central. One winner will be chosen by Random.org.
Good luck!
HandmadeMN members are not eligible to win.
Fun Friday Finds ~ Minnesota Vintage
By Jenna Halek ~ Artistic Edition
Minnesota Vintage
Visit these HandmadeMN shops to see more:
Click on any of the names below
First Row (Left to Right): SteampunkVintage, STELLAandHODGE, greensquirrel, lightreading
Second Row (Left to Right): Owlshop, waternymph, wildheart515, RosaliesTreasures
Third Row (Left to Right): cayennepeppy, ALottaJazz, ekate, JenMDesigns
Forth Row (Left to Right): looksSEWnice, fromoutofthecracks, TCWitchcraftFactory, kellybot
Second Row (Left to Right): Owlshop, waternymph, wildheart515, RosaliesTreasures
Third Row (Left to Right): cayennepeppy, ALottaJazz, ekate, JenMDesigns
Forth Row (Left to Right): looksSEWnice, fromoutofthecracks, TCWitchcraftFactory, kellybot
Minnesota Recycled
by Rita Wetzel of RitasCreationsOnETSY and AndMoreBags
The first shout out is going to none other than myself!! I have started to recycle old T-Shirts into OOAK (one-of-a-kind) purses and totes! Here is one of my favorites from a "Cherry Scent Car Freshener" T-shirt!
ShaggyBaggy has several bags and totes that are made from recycled burlap coffee sacks! Just take a look at this one! The colors are very striking!
Now here is another purse made from a recycled camouflage skirt by CyberFiber.
And GinghamLife repurposes old table linens and hand embroidery into one-of-a-kind aprons, clothing, and tea cozies. This apron is a 1940's style tea apron that was made from a floral print tablecloth, cotton gingham and vintage rickrack.
Are you interested in finding more recycled and repurposed items from HandmadeMN members? If so, search on HandmadeMN and then either recycle or repurpose and you will find many unique items from creative Minnesota!!
Subscribe to:
Posts (Atom)