 Last spring I designed a cloth doll I called Prairie Flowers. She is a simple cloth doll, 11 1/2 inches tall, made from 100% woven cotton material. Above is Lillian, one of the dolls I made a year ago.
I've come back to these cloth dolls, to make the pattern available, and to see what kind of different looks can be achieved with this cloth doll pattern.
The pattern for the doll is located here: http://sites.google.com/site/designbybethann/home/links/PrairieFlowersDoll.pdf?attredirects=0&d=1
A picture tutorial for making the doll is located here: http://www.flickr.com/photos/29184580@N04/sets/72157623903215816/
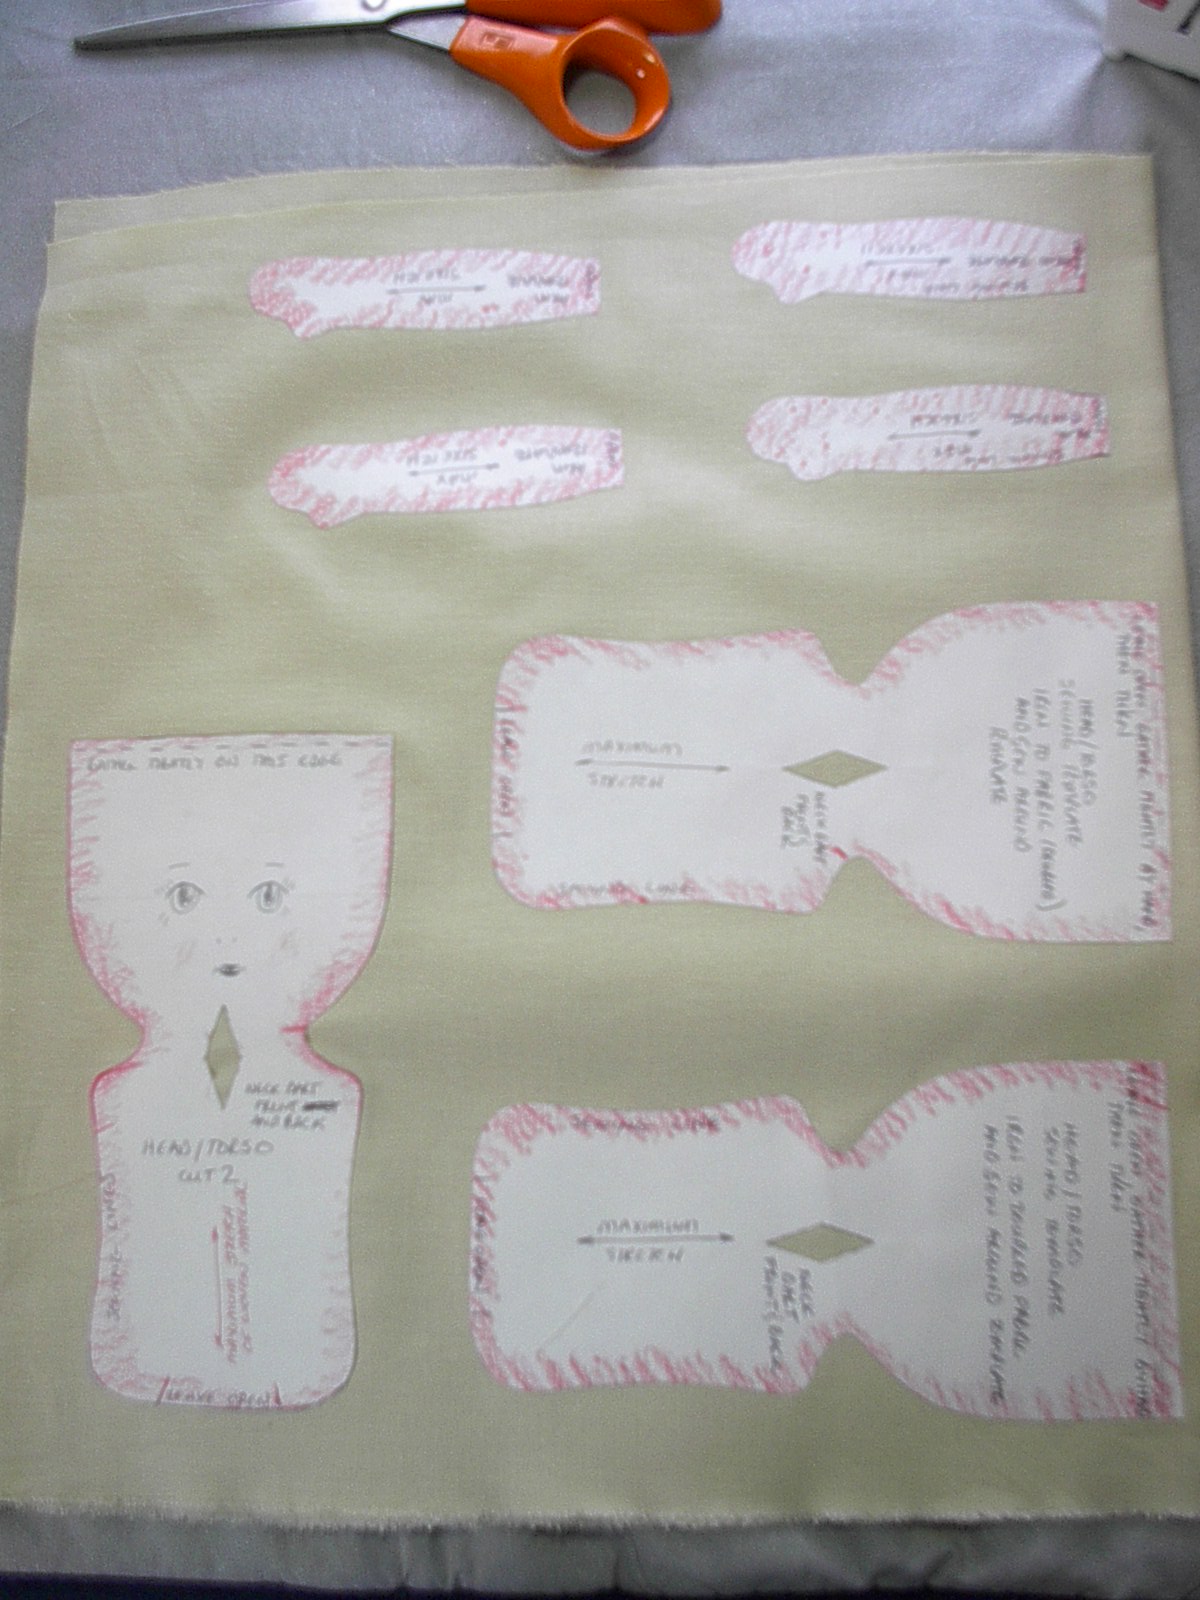 The pattern for the doll is a 'template' that is traced onto freezer paper (available here: http://www.dollmakersjourney.com/supplies.html, near the bottom of the page). Trace the pattern to the non-shiny side of the freezer paper, cut out, and iron the pattern to the fabric. The edge of the template is the sewing line, so make sure to leave plenty of space between pattern pieces for the seam allowance.
 After the pattern pieces have been sewn and turned, stuff the pieces with your favorite stuffing material. I've mentioned this before, but the best way to stuff a cloth doll is to lightly dampen the pieces with a mist of water. Work the material in your hands after it is dampened, and stuff the body firmly. Dampening the material will help to eliminate wrinkles when you stuff.
 It is also VERY important to pay attention to the stretch of your fabric, and how you lay the pattern pieces on the material. These two bodies were made from the same pattern piece; but one was laid on the fabric with the stretch along the length of the body, and the other with the stretch running from side to side. The pattern pieces are marked how they should be placed. Before ironing them on, stretch your material along the grain and across it to determine which way the maximum stretch runs.
  After all the parts are nicely stuffed, it is time to make the face, and perhaps add a touch of embroidery to the neckline of the doll. The tutorial shows a way to make the faces you see here; they are a combination of paint (for the iris and pupil of the eye), embroidery (mouth, nose, eyebrows, and iris), and crayon, to blush the cheeks. It is easier to do this and the embroidery before the limbs are attached to the doll.
 Two new Prairie Flowers :-) I called them this because of the flowers embroidered around the neckline.