HandmadeMN Giveaway - Stamp Out Cancer

By Jessica of Clay By Clay

Congratulations to our latest giveaway winner! Thanks to all who entered and we wish you good luck with this week's giveaway!

This week our giveaway is from a shop supporting a good cause. Enter to win this lovely set of notecards from Andrea and Becca of Stamp Out Cancer. 100% of proceeds from this shop go to the Leukemia and Lymphoma Society.


The giveaway includes 10 Thank You cards with an Asian motif. These 10 cards are hand stamped in dark brown ink on cream cardstock. The front features a spring of flowers, hand-colored in pastels. The insdes of the cards are blank. Each card measures approximately 4 1/4 by 5 1/2 inches with matching size envelope. Perfect for any thank you occasion You can check out Andrea's other shop at The Hobby Room.


How to Enter:
Visit Andrea and Becca's shop pick your favorite item and leave a comment on this post about it. (Scroll to bottom of post and click on Comments, or just click here.)

Please make sure we have a way to contact you!

For Bonus Entries:
Please leave each in a separate comment, as each comment is an entry (To qualify for extra entries you must do step one above).

1. Visit other HandmadeMN team members shops (listed in the sidebar here) and leave a comment(s) here with your favorite pieces.

2. Blog about this giveaway with a visible link back to this posting and comment here with a link to your post.

3. Tweet about this giveaway and leave a comment(s) with a link to your tweet(s).

4. Follow our blog (you want to do this anyway to learn about upcoming giveaways!). Leave a comment here letting us know you are a follower. If you are already a follower, leave a comment anyway, as each comment is an entry.

5. Follow HandmadeMN on Twitter. Comment back here with your Twitter link. Existing followers just leave your Twitter link here.

6. Become a Facebook Fan of Andrea and Becca or of HandmadeMN. Comment back here with your Facebook name. Existing fans just leave your Facebook name here.

7. Follow Andrea and Becca's blog. Leave a comment here letting us know you are a follower. If you are already a follower, leave a comment anyway, as each comment is an entry.

8. Follow Andrea and Becca on Twitter. Comment back here with your Twitter link. Existing followers just leave your Twitter link here.

Contest ends Saturday, March 13, at 12:00 noon Central. One winner will be chosen by Random.org.

Good luck!

HandmadeMN members are not eligible to win.

From my Archives

This is a pattern I designed back in 2008, and made many dolls from. In fact, my flickr Avatar is a doll from this pattern. Anyway, one of my flickr friends wanted to make this doll, with cat ears, for her grandkids and their friends, so I'm putting the pattern up here for her and anyone else who is interested. It has been a while since I've made a doll from this pattern, so the pattern may not be perfect. It does include instructions for Human, Cat, and Bear ears, and there are some pictures on my flickr site of dolls made up with these.

Like most Amigurumi, this doll is very simple to make, consisting of single crochet in worsted weight yarn. The pattern calls for 'soft' yarns, but any worsted acrylic will work. My problem with most 'soft' yarns is that they split and can be a pain to crochet. These dolls are about 10 inches tall, I think. Unfortunately I don't have any of them anymore; they have all found homes :-)

One of the nice things is that the clothing patterns are also made from worsted yarn, so they make up fast, and they are simple.

Here are the links to the patterns, which can also be found on the left sidebar under Basic Amigurumi Doll:

Basic Doll: http://sites.google.com/site/designbybethann/home/links/Basic_Crochet_Doll.pdf?attredirects=0&d=1

Basic Aran Sweater: http://sites.google.com/site/designbybethann/home/links/Basic_Crochet_Doll_AranSweater.pdf?attredirects=0&d=1

Basic Jeans: http://sites.google.com/site/designbybethann/home/links/Basic_Crochet_Doll_Jeans.pdf?attredirects=0&d=1

Basic Skirt: http://sites.google.com/site/designbybethann/home/links/Basic_Crochet_Doll_Skirt.pdf?attredirects=0&d=1

Basic Cardigan Sweater: http://sites.google.com/site/designbybethann/home/links/Basic_Crochet_Doll_Sweater.pdf?attredirects=0&d=1

Basic Tank Top: http://sites.google.com/site/designbybethann/home/links/Basic_Crochet_Doll_Tank_Top.pdf?attredirects=0&d=1


Becky, I hope you enjoy making the dolls :-)


Fun Friday Finds ~ Fly Away with Me!

By Jenna Halek ~ Artistic Edition

Fly Away with Me!
(Click on the image to enlarge)

Visit these HandmadeMN shops to see more:
Click on any of the names below
First Row (Left to Right): MaryLittfin, AdornJewelry, maebyknot, cayennepeppy
Third Row (Left to Right): PlushroomSoup, StarglowStudio, JulieMeyer, jackielehmann
Fourth Row (Left to Right): WildDogStudio, ALineofHerOwn, westernartglass, one9designs

8 Questions with...Renae Redenius


Meet Renae Redenius. She just moved to St. Paul last May to live with her boyfriend. Half of her family live in Minnesota, and the other half lives in South Dakota. She currently work as an inventory specialist, but is working on finding a job in either pattern making or product developement for soft goods. You can find Renae on her Etsy store, Trigo. She doesn't have a blog at this time because she's generally too busy working on various experiments.


1. What types of items do you sell in your store?

I started off selling odd sockmonkeys and hand embroidered purses, but now I'm moving more towards recycled monster coin purses because they have so much personality!

2. Where do you get your inspiration?

My best ideas come to me right before I fall asleep at night. I also tend to be inspired by the materials I have at hand. One creativity exercise I do is to look at an ordinary object and try to see how many uses I can think of for that object.

3. Do you have a specific space where you do most of your work?

I have a small studio area set up in the living room of my apartment, but they tend to spread out and take over the rest of the room as well.

4. When did you first start crafting?

When I was a child my sisters and I used to embroider squares of fabric that my mom would then sew into quilts for us. I didn't seriously start to craft until I was in the army and deplyed to Iraq. My family would send me cross stitch kits to keep me busy and I would find ways to personalize them. I was also sent a small stitchery sample kit and that was when I started to branch out and explore other crafting methods. I also did macaroni pictures and marrionette goats from various findings around the office. I'm a very curious person, so I'm always looking for new things to try.

5. Do you do any crafts or art beyond what you sell?

I make toy kittens that I donate to Bundles of Love here in the cities. It is an organization that gathers donated items and baby clothes that are made by volunteers and they make bundles that contain everything a baby needs it's first two weeks in life. These bundles are then given to needy families. Their website is worth checking out.

6. What are your favorite places to buy supplies?

I love to go to Artscraps here in the cities. They are super friendly and its a great place for people who are interested in making crafts from recycled items. They also hold birthdays parties for small children.

7. What is the best thing you've ever done to promote your etsy store?

I joined flickr and have posting my pictures in different crafts groups. I also like to frequent the forums on etsy.

8. What other etsy store(s) do you really like?

I really like be Banana. She's very talented and I've told her that her prices are way too low. I think she just needs more confidence in herself. I bought a couple pouches from her and the quality was amazing.

I also think that Recycedelic has some very unique items.

SugarPickle has some really neat plastic wallets and she donates all her profits from that shop

Featured Shop: Sarah Mandile Photography

By Sara of Auntie B Online

Hi Sarah. It's me, the other Sara.

Sarah and I have something in common other than Etsy and HandmandMN. We also work in the same place for our day jobs. But we don't want to talk about that here. Sarah Mandile should be best known for her wonderful photography. Sarah's shop, Sarah Mandile Photograhy has lots of wonderful prints and note cards and continues to grow.

I love the detail she gives with her up-close and personal botanicals. The waterlily is one of my favorite flowers of all time, and Sarah captured this one beautifully.


This note card took my breath away with the full moon, the evening lights, and the mighty Mississippi. And hey, isn't that the post office? I think it depicts a cosmopolitan serenity.


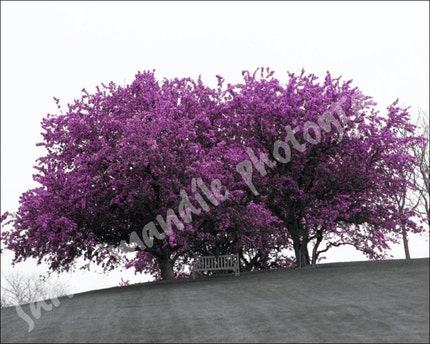
I adore this photograph Sarah took at the Minneapolis Arboretum. It has a misty look with the black-and-white background and subtle pink tree. Gorgeous!


If you're a fan of cityscapes or landscapes, I think you'll like Sarah's photographs. She captures so many aspects of the Twin Cities and manages to bring her images alive. Sarah also does custom work! Visit Sarah Mandile Photography and see what she can offer you.


HandmadeMN Giveaway - Harvest Moon by Hand

By Rita Wetzel of RitasCreationsOnETSY and AndMoreBags

Congratulations to our latest giveaway winner! Thanks to all who entered and we wish you good luck with this week's giveaway!

Today we bring you this beautiful 16-point green window star from Ann of Harvest Moon by Hand.


This star uses a special type of paper which is folded 160 times to create the pattern. When placed in a sunny window, the pattern of the star is revealed and has almost a stained-glass appearance to it.

How to Enter: Visit Ann's Shop, pick your favorite item and leave a comment on this post about it. (Scroll to bottom of post and click on Comments, or just click here.)

Open to US resident only.

Please make sure we have a way to contact you!

For Bonus Entries: Please leave each in a separate comment, as each comment is an entry (To qualify for extra entries you must do step one above).

1. Visit other HandmadeMN team members shops (listed in the sidebar here) and leave a comment(s) here with your favorite pieces.

2. Blog about this giveaway with a visible link back to this posting and comment here with a link to your post.

3. Tweet about this giveaway and leave a comment(s) with a link to your tweet(s).

4. Follow our blog (you want to do this anyway to learn about upcoming giveaways!). Leave a comment here letting us know you are a follower. If you are already a follower, leave a comment anyway, as each comment is an entry.

5. Follow HandmadeMN on Twitter. Comment back here with your Twitter link. Existing followers just leave your Twitter link here.

6. Become a HandmadeMN Facebook Fan. Comment back here with your Facebook name. Existing fans just leave your Facebook name here.

7. Follow Ann on Twitter. Comment back here with your Twitter name. Existing fans just leave your Twitter name here.

8. Become Ann's Facebook Fan. Comment back here with your Facebook name. Existing fans just leave your Facebook name here.

9. Follow Ann's blog. Leave a comment here letting us know you are a follower. If you are already a follower, leave a comment anyway, as each comment is an entry.

Contest ends Saturday, March 6, at 12:00 noon Central. One winner will be chosen by Random.org. Good luck!

HandmadeMN members are not eligible to win.

Fun Friday Finds ~ HandmadeMN Gold Rush

By Jenna Halek ~ Artistic Edition

HandmadeMN Gold Rush
(Click on the image to enlarge)

Visit these HandmadeMN shops to see more:
Click on any of the names below
First Row (Left to Right): mermaidsdowry, harvestmoonbyhand, greensquirrel, Crafterall
Second Row (Left to Right): ChickaDeesigns, gemnorde, vintagenouveaudesign, XOSupplies
Third Row (Left to Right): regansbrain, kellybot, StarglowStudio, janraven
Fourth Row (Left to Right): damonique, FoxglovePhoto, SteampunkVintage, Bryanica

February Challenge Winner

By Toni of Wild Dog Studio


Congratulations to Jenni of Riverbird for winning February's HandmadeMN monthly challenge!

Thanks to all who participated in this month's challenge, and stay tuned for some great "Go Green" entries coming soon!

Inspire Me

by Cheri of From Out of the Cracks

“I can always be distracted by love, but eventually I get horny for my creativity.” - Gilda Radner

Where does that creativity come from? What was the inspiration, the spark? Do you go somewhere to get inspired?

Here is our featured HandmadeMN artist Regan K. Saunders of Regan’s Brain. Regan says, “my shop is a collaboration between me and my brain. It's filled with odds and ends and most people won't understand, but it makes perfect sense to me.” You can also check Regan out on her Facebook fan page.

Regan says, “I was having a conversation with my "brain" one day, explaining that I wanted to start selling pillows in my Etsy shop. I just didn't know what kind of pillows to make. His response was, "You should make an Edgar Allan Pillow! Or a Henry David Thoreau Pillow! Get it…throw pillow? Seeing that Mr. Thoreau was a less than attractive man, the Poe pillow was created.”


“I had read a lot of Poe in my early adolescence, and felt that the pillow needed to have a dark, eerie feel to it. Using the most famous portrait of Poe I created his image from felt, making it seem as if he were staring at you from all corners of the room (extra creepy!!!). I chose gray for the fabric of the pillow because... well... what other color would work? Gray has that "fog" feeling to it and I felt it best represented Poe's Gothic style.”


Author Photo

This week, in addition to completing this round of revisions with HarperCollins (almost done, crossing fingers!), I also have to fill out my author questionnaire and send in a photo that will be my official "author" photo for this book.  I am really stuck about which photo to send, so I'm asking for your vote.  I've narrowed it down to four:

Choice #1:  This one is ideal, because I am rather desperate to get a picture of the Tetons somewhere on my book (the mountains are an integral part of the setting of the novel) and this would be a sneaky way to do it.  Still, the lighting is a bit off.

Choice #2:  Here's another with the Tetons and again (argh!) the lighting is not great.  My husband pointed out that in Choice #1 and Choice #2, you can tell that I'm taking my own picture.


Choice #3:  I include this one in black and white because what's behind me is actually mud, which doesn't look great, but I like the picture well enough.  One thing that good author photos evoke, I think, is the sense that the writer could represent the main character (good luck with this for me, ha!, since my MC is a 17-year-old strawberry blonde ANGELIC being).

And Choice #4: my go-to author photo, with books in the background. I think every writer everywhere has a photo like this stashed away, standing in front of books with a contemplative expression, like you're just about to sit down and whip out the next great American novel.


So, let me hear from you! Which photo would YOU see on the back of a book and say to yourself: "Hey, this writer looks like she could really tell the kind of story that I would love to read!"

The Little Gardener


If the flowers aren't blooming outside, you can always crochet yourself a garden that will never wilt :-)


My sister is a terrific gardener, so for her birthday this year I've made her a gardening mascot. The flowers crocheted here are many of our favorite spring blooming flowers: columbine, narcissus, pansies, and roses. The grassy carpet is a circle crocheted of worsted yarn and eyelash yarn together. I used the eyelash yarn in every other round.


The lovely flowers are from the book 'Crochet Bouquet' which was published in 2008. I was able to borrow it from our local library, but I think I'm going to have to purchase this one! It has some of the best flower patterns I've ever seen. This is the first crochet columbine that actually looks like the real thing :-) Some of the flowers are funky, some are fun, and some (like these) downright realistic. A great book.

Is It Spring Yet?

by Rita Wetzel, RitasCreationsOnETSY and AndMoreBags

Once again, I am sitting here watching this white stuff fall from the skies. More snow is predicted for tomorrow - not only here in Minnesota, but also across other major areas of the nation! This winter has brought more snow to more places than we have had in a long, long time. Record snowfalls have been experienced, rush hours have turned into rush crawls, and shoveling snow has become our latest pasttime!

I have seen many posts on Facebook, Twitter, and boards asking if spring is every going to come! I believe the answer is "yes." And why am I confident that spring will be here soon? Well, just take a look at these spring creations that our Minnesota Artists and Crafters are already making. If there was no hope for spring, would we be putting in our time and effort and creative genius into making these awesome handcrafted items?


Glorioushat has listed this beautiful Rose and Lime Brooch. Doesn't this remind you of rose bushes in full bloom! And the green - I can smell the fresh spring smells after a nice, cleansing rain!


From SugarandSpice, we have the Easter Bunny Annie Cloth Doll. Looks like the rabbits will have some friendly competition this Easter from these cuties!


Tulips! Tulips for sure are a sign that spring is just around the corner. Take a look at these wonderful Tulip Note Cards from CindyLindgren's shop.


And what about these lovely "A Day in Spring Earrings" from Vintagenouveaudesigns! Spring blossoms are just around the corner! Can you smell them?


I love my peonies that bloom every spring. They are mostly red and pink peonies but I do have one white peony bush! Here is a lovely Festiva Maxima Peony 8 x 10 photo from MaryFosterCreative that captures the essence of the spring peony so very well!


So, spring is just around the corner! When the snow gets you down, please come back here for an early breath of our spring renewal and our spring smells compliments of HandmadeMN!!


HandmadeMN Giveaway - Danger Kitty Designs

By Jessica of Clay By Clay

Congratulations to our latest giveaway winner! Thanks to all who entered and we wish you good luck with this week's giveaway!

Today we bring you an adorable cotton plush elephant from Chelsey of Danger Kitty Designs.


This sweet little guy is made in black and white patterned fabric to represent yin and yang. One side is black with a white ear and one side is white with a black ear. He has big floppy ears and a cute ribbon tail. He is 6" by 9" (15 cm by 23 cm).

How to Enter:
Visit Chelsey's shop pick your favorite item and leave a comment on this post about it. (Scroll to bottom of post and click on Comments, or just click here.)

Open to US resident only.

Please make sure we have a way to contact you!

For Bonus Entries:
Please leave each in a separate comment, as each comment is an entry (To qualify for extra entries you must do step one above).

1. Visit other HandmadeMN team members shops (listed in the sidebar here) and leave a comment(s) here with your favorite pieces.

2. Blog about this giveaway with a visible link back to this posting and comment here with a link to your post.

3. Tweet about this giveaway and leave a comment(s) with a link to your tweet(s).

4. Follow our blog (you want to do this anyway to learn about upcoming giveaways!). Leave a comment here letting us know you are a follower. If you are already a follower, leave a comment anyway, as each comment is an entry.

5. Follow HandmadeMN on Twitter. Comment back here with your Twitter link. Existing followers just leave your Twitter link here.

6. Become a HandmadeMN Facebook Fan. Comment back here with your Facebook name. Existing fans just leave your Facebook name here.

7. Follow Chelsey's blog. Leave a comment here letting us know you are a follower. If you are already a follower, leave a comment anyway, as each comment is an entry.

8. Follow Chelsey on twitter. Comment back here with your Twitter link. Existing followers just leave your Twitter link here.

Contest ends Saturday, February 27, at 12:00 noon Central. One winner will be chosen by Random.org.

Good luck!

HandmadeMN members are not eligible to win.

Fun Friday Finds ~ Lucky Stars

By Jenna Halek ~ Artistic Edition

Lucky Stars
(Click on the image to enlarge)

Visit these HandmadeMN shops to see more:
Click on any of the names below
First Row (Left to Right): BirchModern, saffronsparrow, looksSEWnice, harvestmoonbyhand
Second Row (Left to Right): FennelStudio, AngelEllie, vintagenouveaudesign, kellybot
Third Row (Left to Right): Sbdesign, PlushroomSoup, QuirkyLove, pinswithfury
Fourth Row (Left to Right): wildheart515, XOHandworks, Harmonia30, lilylunagardener

Free Printable Valentine's Day Cards


Don't get caught without a card for your sweetheart this year! Thanks to, Just Another Day Designs, you can now download cards for your special someone!

There are two designs in the pdf (one of them shown in picture). Just open, print out on some cardstock, trim on the dotted line, fold and give to your valentine(s)!

Download here!

{All downloads by you (the User) from Just Another Day Designs are to be for your own personal use only, and under no circumstances shall be allowed for commercial usage or redistribution of any kind. Thank you!}

Adapting patterns for Free Spirit

I am having a great time adapting patterns for Free Spirit. She is 11 to 12 inches tall, and turns out to be a good size for many of the patterns designed for the Fibre Craft 13 inch and 15 inch dolls. The great thing about crochet is that you can fit as you go, so if you need to remove a row or two in the bodice, or nip the waist in a couple stitches, it is very easy to do this as you are crocheting.

For the outfit above, in addition to using a size E hook and Red Heart Soft worsted yarn, I took in four stitches at the waistline, and removed two rows from the skirt. Sleeves and neck did not need to be altered. It fits Minerva very nicely :-) This was a pattern designed for the 13 inch Fibre Craft doll.


For this American Indian costume, I removed two rows from the bodice, and two rows from the skirt. I used a size E hook and Caron Simply Soft. This costume was designed for the 15 inch Fibre Craft doll. So what I notice is, the 13 inch doll bodice needs to be reduced in the waist, and the 15 inch doll bodice needs to be shortened slightly.

I crocheted these outfits very tightly; the gauge was six sc to one inch. I think they could be made in sport weight and a slighly looser grip on the hook with the same alterations.

Free patterns are available, and there are also out-of-print patterns available from Amazon, and from this site:

http://www.treasuredheirloomscrochet.com/index.html

Enjoy the crochet!

Resin Tutorial

by Sarah Bober of SB Design


I started working with resin about two years ago, after realizing that a lot of the jewelry I was drawn to used one resin technique or another. I am now officially hooked. I love the versatility resin presents, and how easy it is to make personal, meaningful items. Resin photo pendants make a great gift for anyone. Check out this site for some ideas. You can also check the out resin pieces I've created in my shop.

A word about resin: this tutorial uses resin, which is durable, permanent and waterproof. There are lots of resin-type products on the market that aren't actually resin, such as Diamond Glaze or Crystal Lacquer. Be very careful when purchasing something that does not specifically say resin. These products are often water resistant but not waterproof. Either product will work, just be sure you know what you want for your design.


This tutorial will teach you how to make three different items using resin: Pendants, Flat Magnets and Round Magnets.


Materials List

Images
Mod Podge
Paintbrush
Scissors
1" Circle Paper Punch (optional)
Magnet Sheet
Magnet Buttons
Pendant Frames
Resin
Mixing Cups
Stir Stick
Resin Dye
Plastic Paint Palette
E6000 Glue

A few notes about materials:
The pendant frames I use are from Becky Nunn at Nunn Designs, part of her Patera Jewelry line. They are the large pendant squares available in antique silver, copper or gold. Check out her website to find where to buy them.

The resin I use is Envirotex Lite, which can be purchased at Michael's or Joann Fabrics. They also sell the resin dye, if you choose to color the resin. Don't forget to bring your 40% off coupon!

1. Prepare your workspace.
Resin is sticky...very, very sticky. The best way to deal with resin spills is to avoid spilling on anything you care about, like your dining room table. Put down a layer of newspaper to protect your work surface. Your resin pieces will take about 24 hours to cure completely. Find a flat, portable surface, like a tray or a book, that you can move to an out of the way place to dry. I use a wooden tray that I cover in wax paper.

2. Prepare your images.
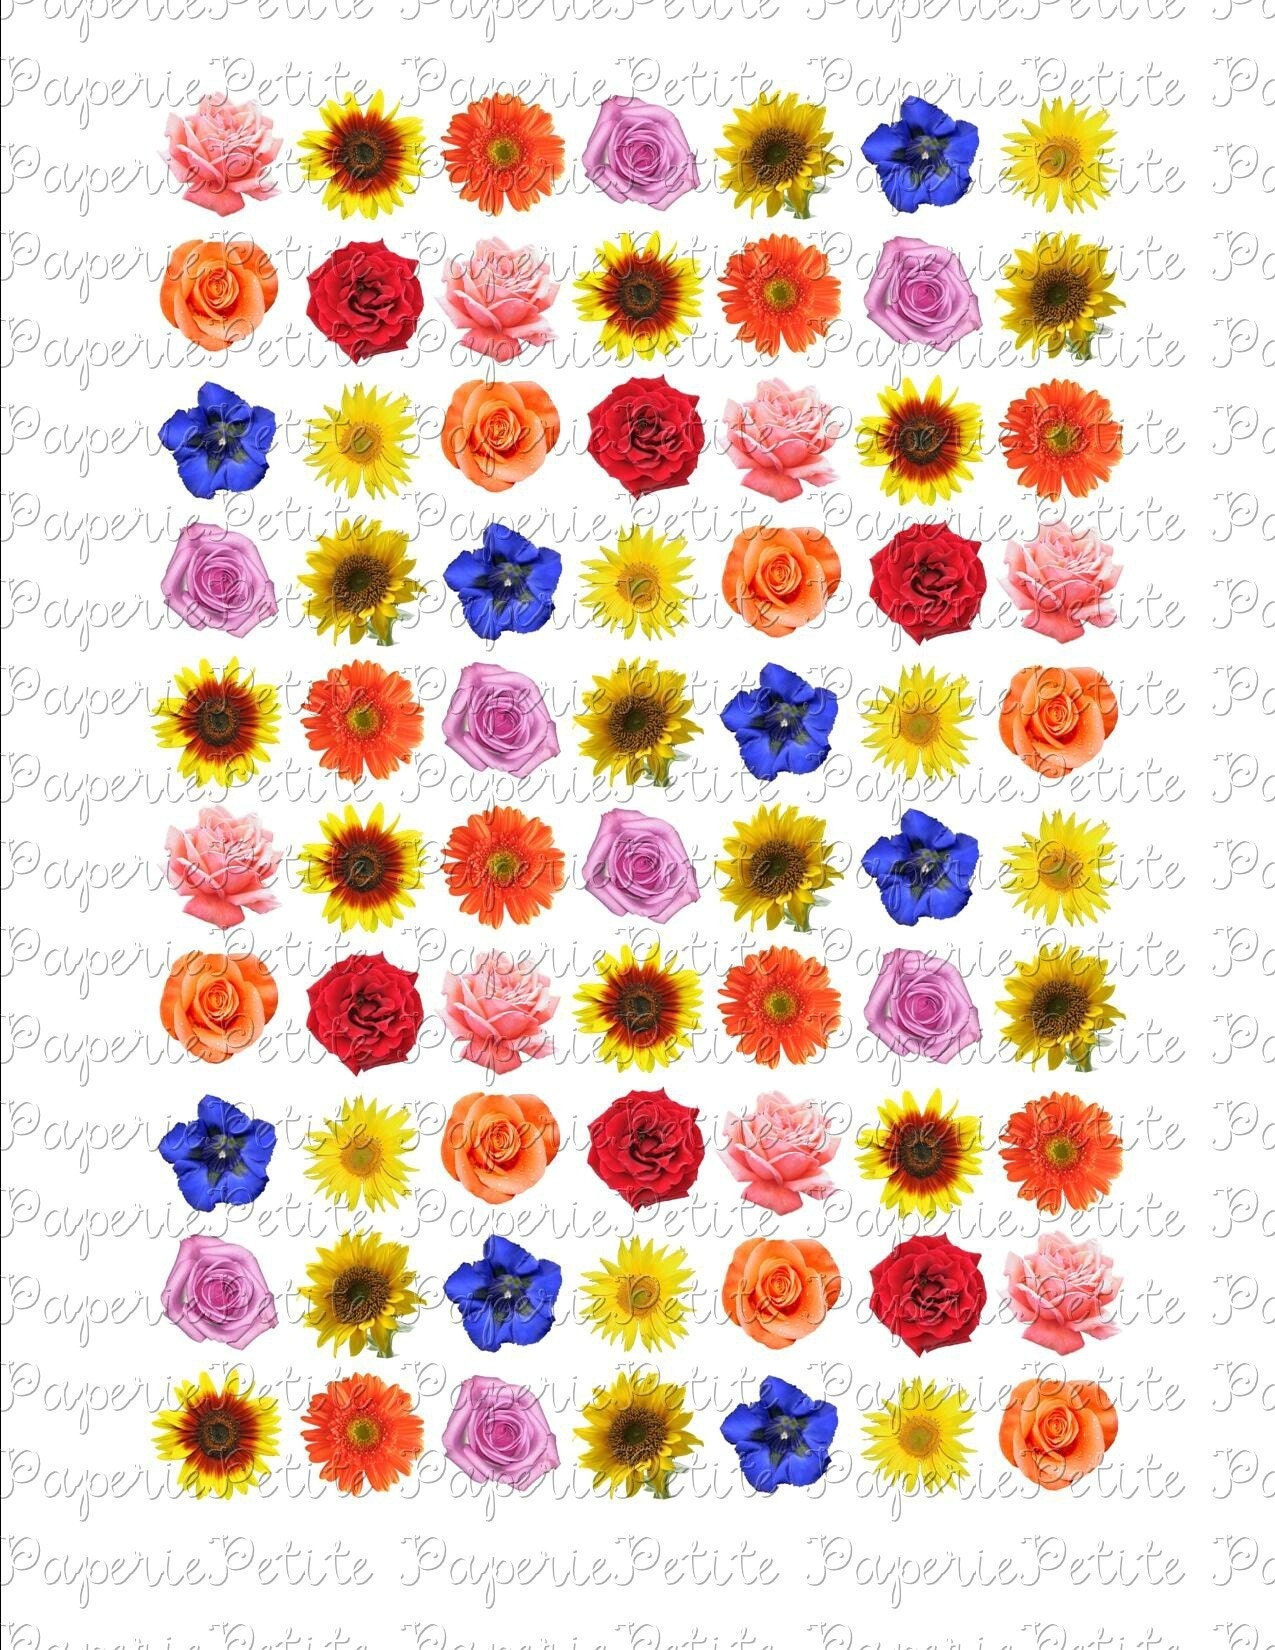
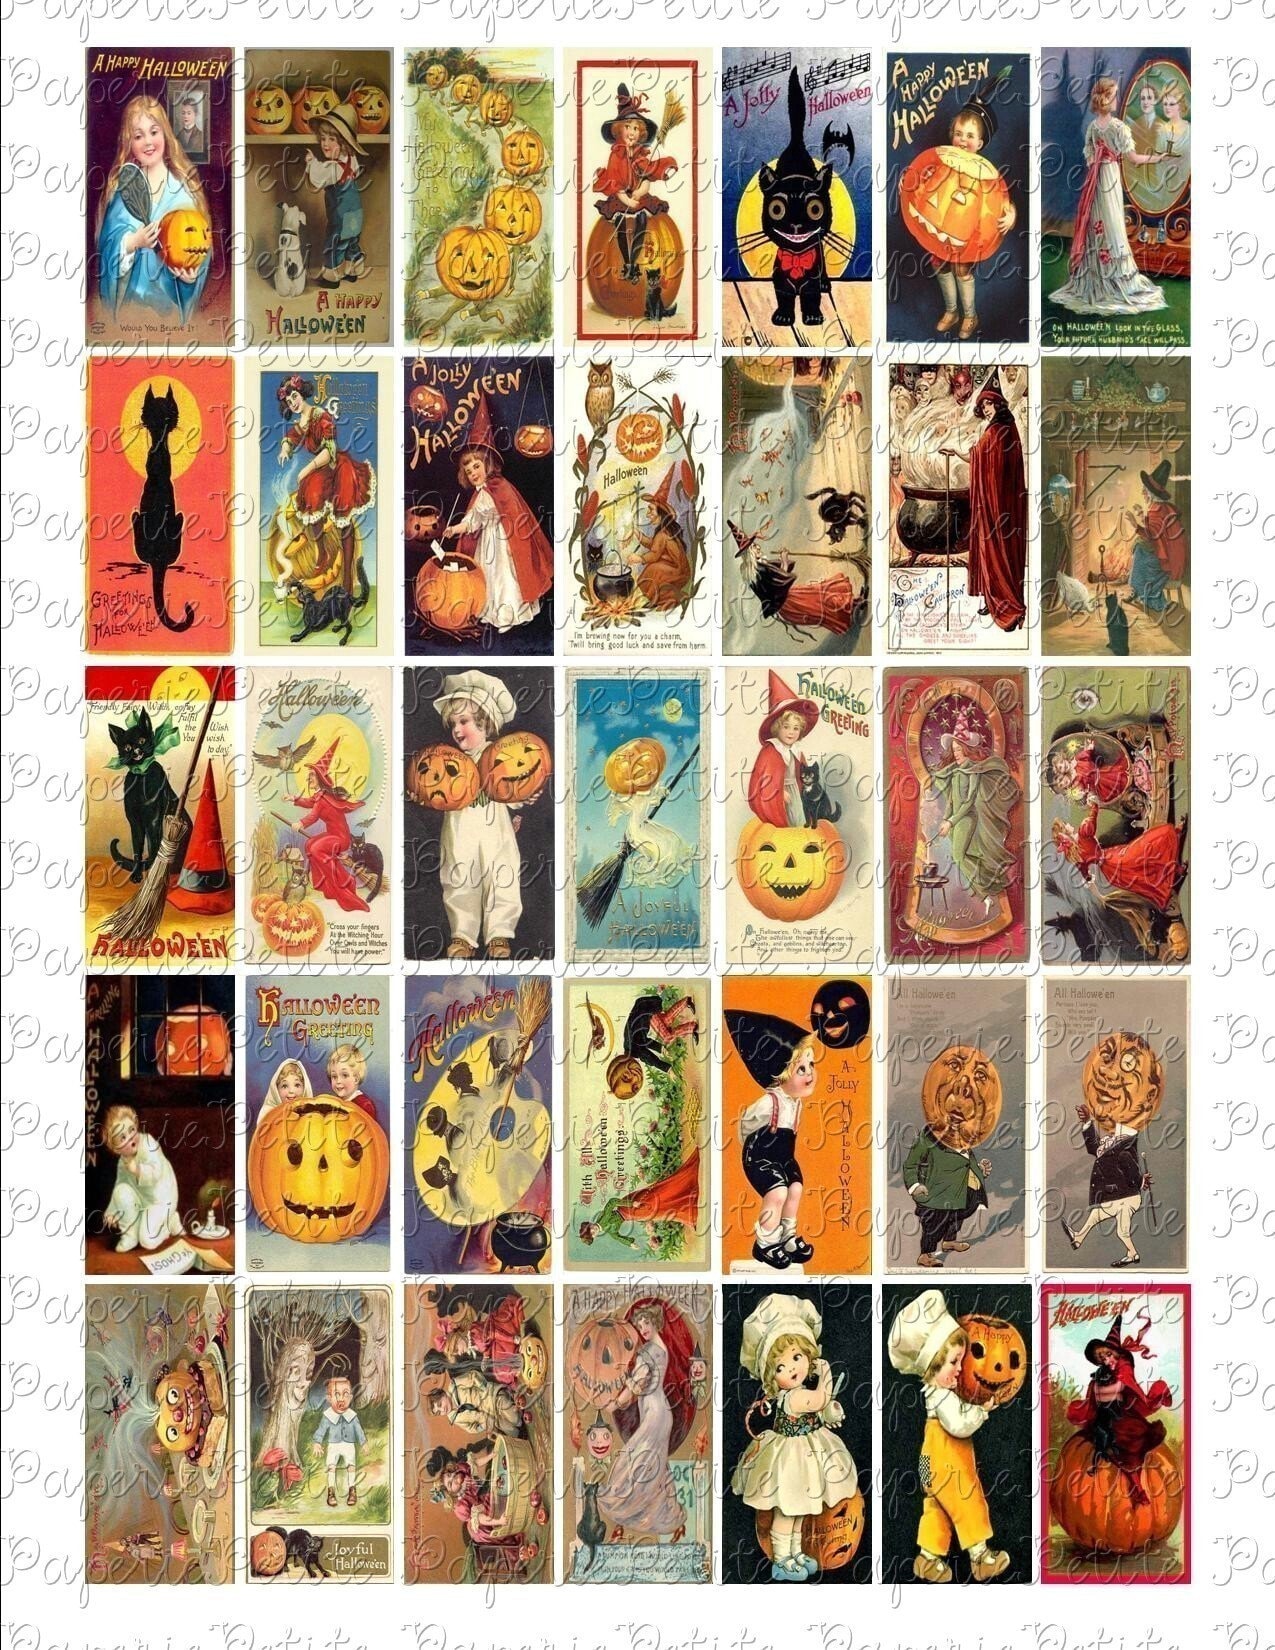
There are so many incredible images out there. The beauty of resin is you can use anything, from magazine pictures to cards to photos, which allows you to create items that are very personal. The images I used are from etsy seller Petite Paperie, who has tons of incredible, high quality image sheets. The best part about working with these sheets is you can save them to use again and again. The sheets I chose were 1" x 1" Square Fruit Crate Labels, 1" x 2" Halloween Postcards and .75" square Bright Flowers. Check out her shop for more options.
Pick the specific images you want to use and cut them to size. Use a paintbrush to coat the images in Mod Podge. Be sure to coat all surfaces, front, back and sides, at least twice and allow to dry completely. You want the image to be completely covered so no resin will seep in and damage your image.


3. Prepare magnets & pendants.


Flat Magnets: Cut the magnet sheet to the size of the image. I keep a very small border of magnet around my image to make sure the resin completely covers the design and adheres to the magnet. Peel away the film to expose the adhesive and apply the image. Trim any excess magnet with scissors.


Pendants: Trim the images to fit inside the pendant frames. Apply a small amount of Mod Podge inside the pendant to glue your images in place. Be sure the outside and corners of the image are firmly stuck to the pendant. This will keep air bubbles from forming.


Round Mangets: Trim the images to fit into the paint palette using scissors or a 1" circle cutter.


4. Prepare the resin.

These directions are specifically for Envirotex Lite Resin. If you are using a different resin, be sure to follow the directions that come with the product.


Warm the resin. This will prevent air bubbles from forming and make the resin easier to mix. Put a bowl of water in the microwave and heat. Put resin and hardener bottles in warm water for several minutes.


Measure the resin into 2 mixing cups. Envirotex Lite resin is a 1 to 1 mixture, meaning equal parts resin and hardener are used. Be sure you measure each part carefully. If the resin mixture is off, your pieces may not cure correctly or may be sticky.


Pour the resin into the hardener. Stir with your stir stick slowly to prevent adding air bubbles to the mixture. When you begin to stir, the mixture will become slightly cloudy. Stir for about 2 minutes, or until the mixture becomes clear again.


5. Apply resin to the pieces.


Flat Magnets: Use your stir stick to slowly drizzle the resin over the magnet sheets. If you apply enough resin it should flow to the outside of the magnet without spilling over. You may need to guide the resin into the corners with the stir stick. If you spill the resin just slide the magnet over a few inches away from the puddle and allow to dry.


Pendants: You can pour the resin into the pendant frames, or drizzle with the stir stick. Fill the resin to the top or allow to dome over slightly, whichever you prefer. Some people like to fill to the top on the first pour and dome with a second layer of resin once the first has dried. Since the pendant frames are not that deep you can dome in the first pour if you choose to, depending on the look you want.


Round Magnets: Pour the resin into the paint palette openings and fill about half way. Let resin sit for a few minutes so you can get rid of any bubbles that form. Once the bubbles are gone, place images face down in the resin and coat with a thin layer of resin. Be sure to leave enough room in the palette opening (at least 1/8") to add your second layer of colored resin.


6. Get rid of bubbles.

Bubbles...they happen. Sometimes they happen after a piece has set and you can't do anything about it. Learn to like them. If not like, at least learn to appreciate them. That said, there are a few ways to get rid of bubbles while the resin is still soft.

- "Huff" on the piece, with short bursts of air. Bubbles are popped by carbon dioxide. Your breathe will bring the bubbles to the surface and pop them. You can also blow gently through a straw.

- Pass some sort of flame over the piece. You have to be very careful with this - do not get too close or you can mar the surface of the resin or create ripples. It also makes the resin smell horrible. But, it does the job, at least most of the time.

- Use a needle or toothpick to get the bubbles to the surface, then either pop or remove them.

For more suggestions on getting rid of bubbles, check out Craft Zombie's blog. You have about a 10-15 minute window for removing bubbles. After that point the resin will start the set and you run the risk of ruining your piece.

Bubbles are MUCH easier to remove when the resin is fresh. If you allow the resin to sit for awhile and then try to remove the bubbles it may be too late. Even after following all these suggestions, you may still get bubbles. And to that I say, that's the beauty of handmade! It's not a mistake, it's artistic. Chances are, you will be your worst critic. Most people won't even notice that bubble that you agonized over. So...do what you can but don't worry too much about it.


7. Add the second resin layer.


This step is only for the round magnets. Anytime after 12 hours the second layer of resin can be applied. Mix another batch of resin and add resin dye. You do not need a lot of dye...a little goes a long way! Start with a few drops and add more as needed. Mix thoroughly. Pour colored resin over the first layer and fill to the top of the paint palette opening. This layer should be level with or slightly below the surface of the palette rather than domed. Watch for 15-20 minutes to remove any bubbles that form.


Cover paint palette and allow resin to cure.


8. Add finishing touches.

Pendants: Add necklace cord to pendants.


Flat Magnets: These should be finished! Put on your fridge and enjoy!


Round Magnets:
Once the resin pieces are cured, remove them from the paint palette. Put the tray into the freezer for 30-60 seconds to help release the pieces from the mold. Use E6000 to glue magnet buttons to back of the resin design. Allow to dry completely.


That's it! You can now make three different resin creations. Resin is not scary and it is far from rocket science, so don't be afraid to try it out. Have fun and be creative!

★★★★★This tutorial was designed as part of Tutorial Exchange Program from Totally Tutorials. Special thanks to Petite Paperie for the fabulous images! Be sure to check out the Totally Tutorials blog for inspiration for your next project.★★★★★